This build is taking forEVER!
It has been over a month since my last build report on the Kharkov and it again seems like I don’t have much progress to report in that time. In between the holidays, work, and family activities, I have managed to spend quite a bit of time on the model but not nearly as much as I would have liked. Also, I feel as if I’ve build this model 2 or 3 times at this point due to all the pieces I have broken and have had to rebuild. Have I mentioned that this model is VERY fragile?
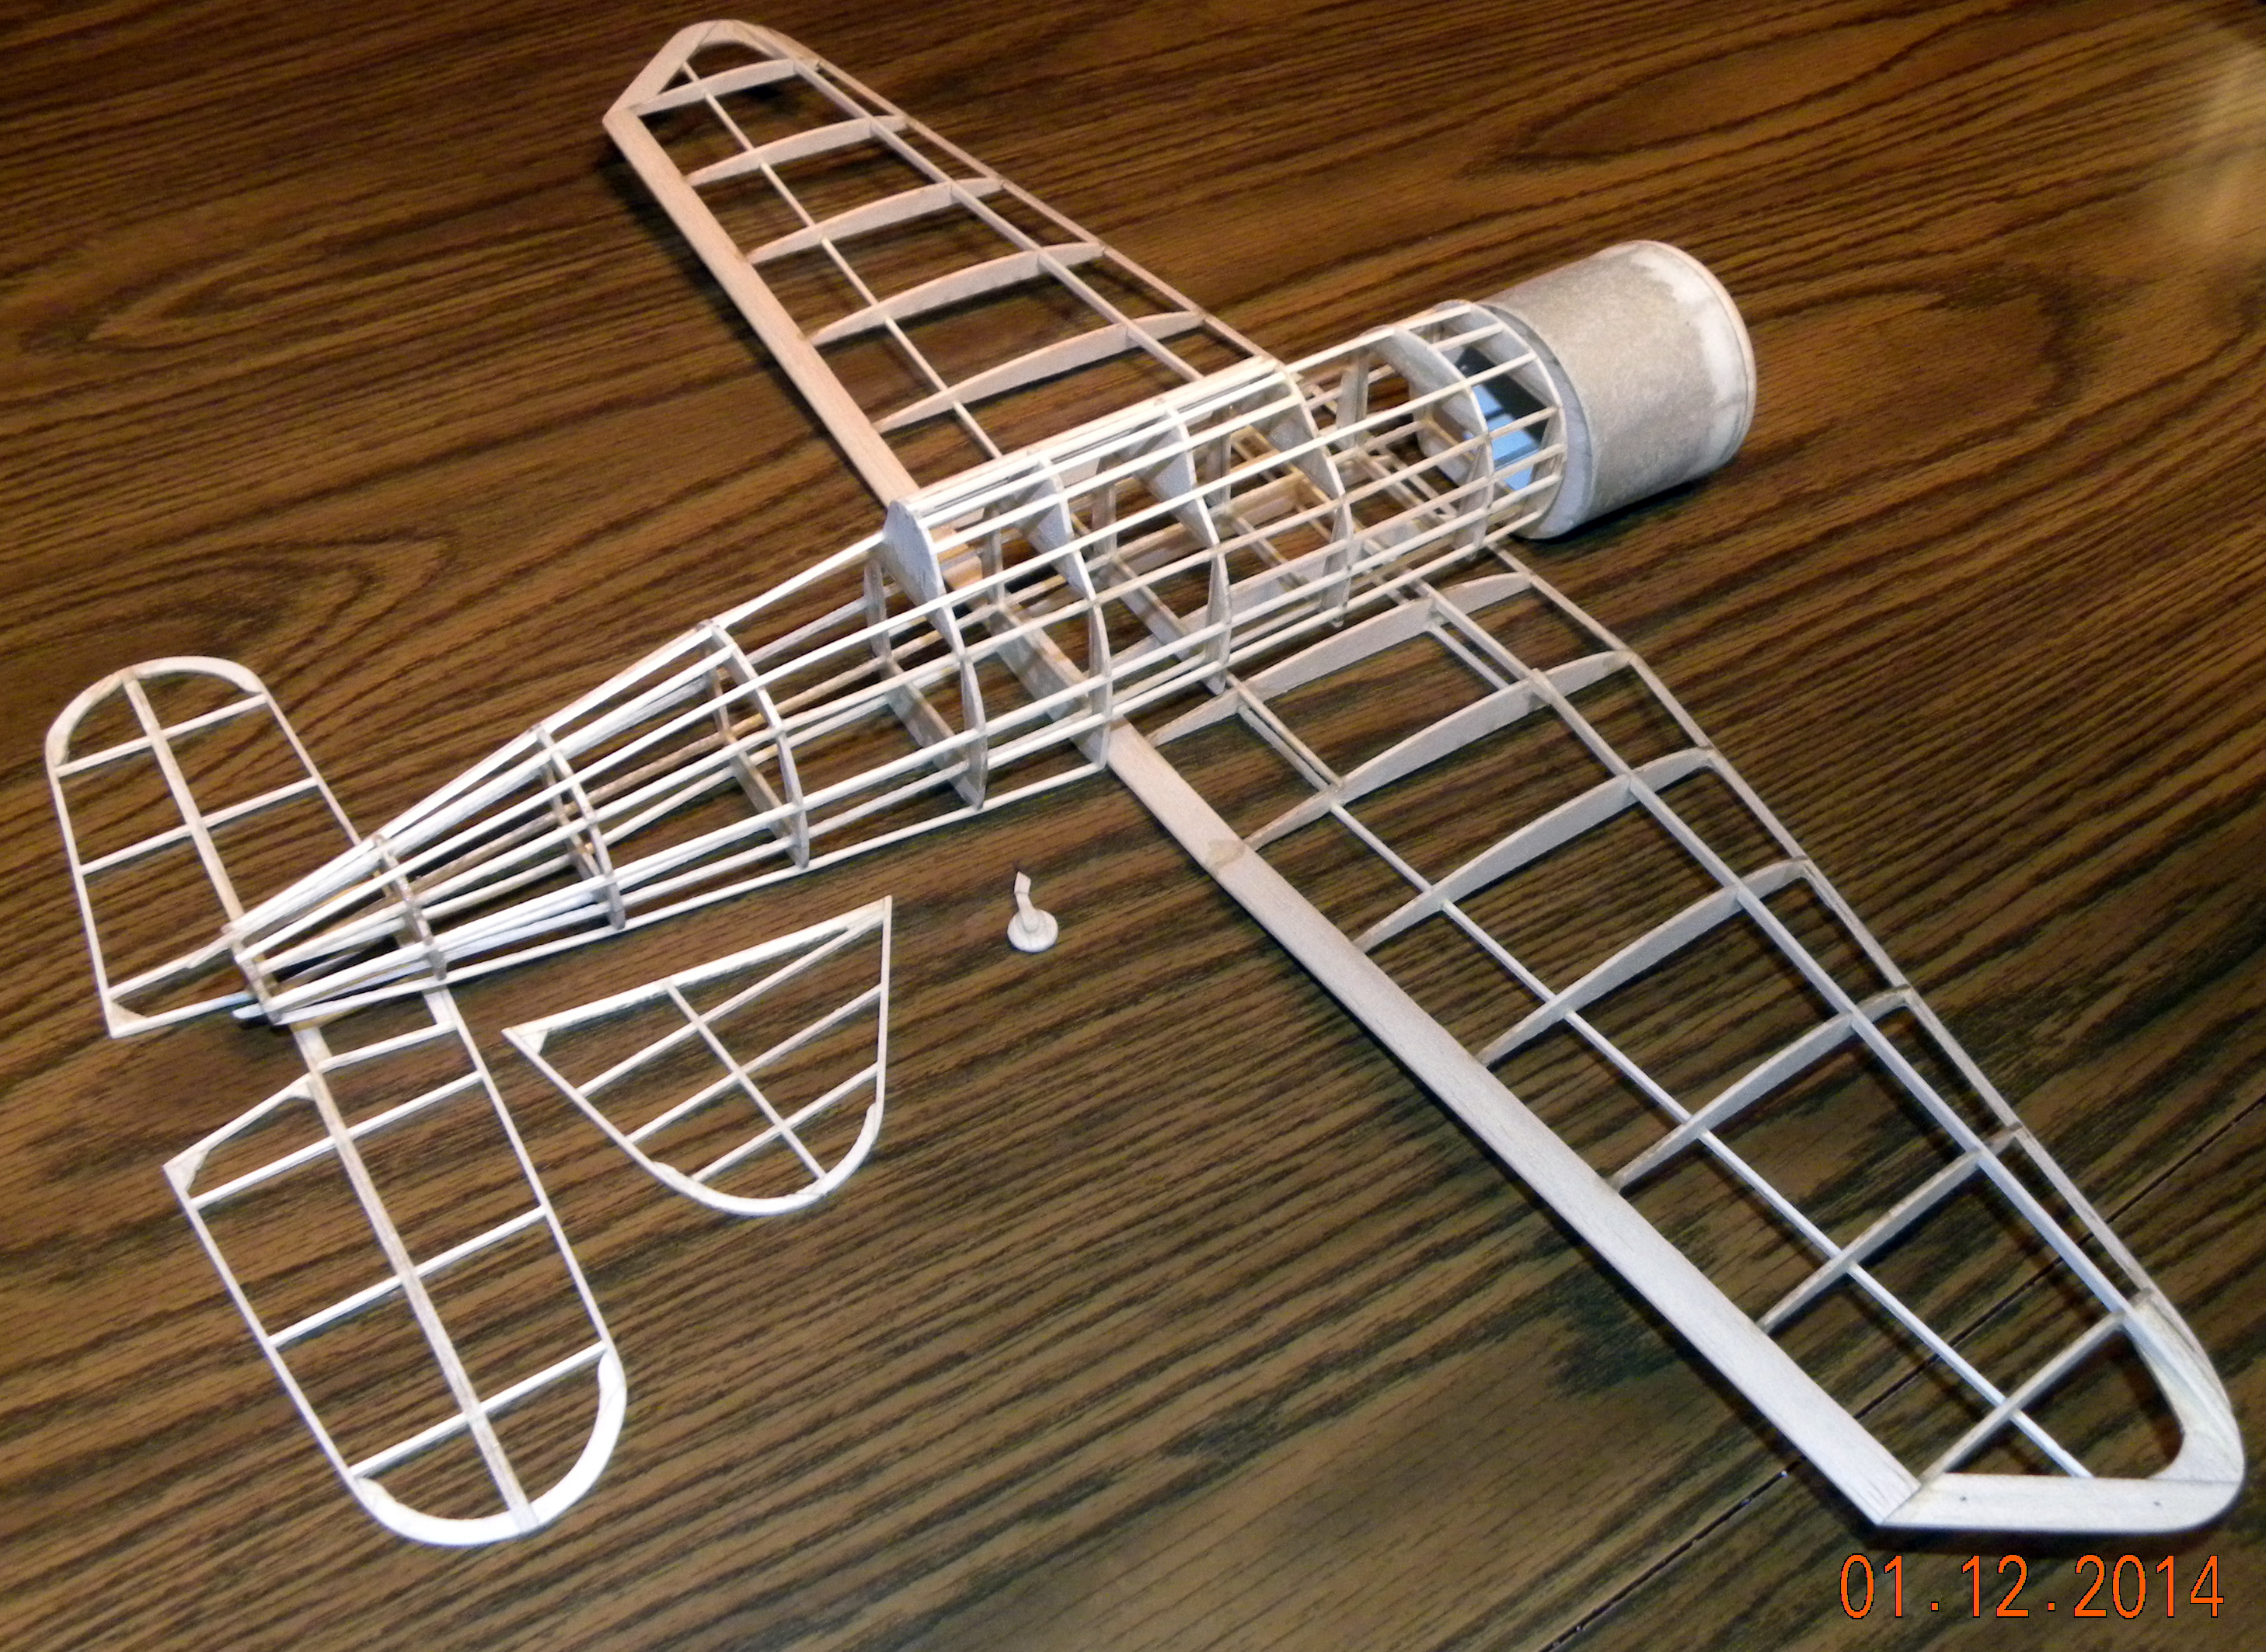
In any event, progress has been made to the point where the structure is all built and I am finally ready to begin the covering process. I am hoping to have this model completed in time to bring it to the upcoming Syracuse ‘Model Aircraft Forum and Indoor Fly In’ on February 1. There is still a lot left to do so I need to get busy!
Here is a recap of what has been accomplished since the last report:
- The wing has been completed. This included trimming and sanding the 4 wing sections and joining them together with the proper dihedral.
- The horizontal stabilizer and elevators have been built and sanded.
- More work was done on the engine cowling and a small tail wheel assembly was completed. I have decided to not make and install the main landing gear for this model. The instructions recommend installing the landing gear for static display only and leaving them off for a flying model. My intent is to fly this model so the landing gear are staying off for now.
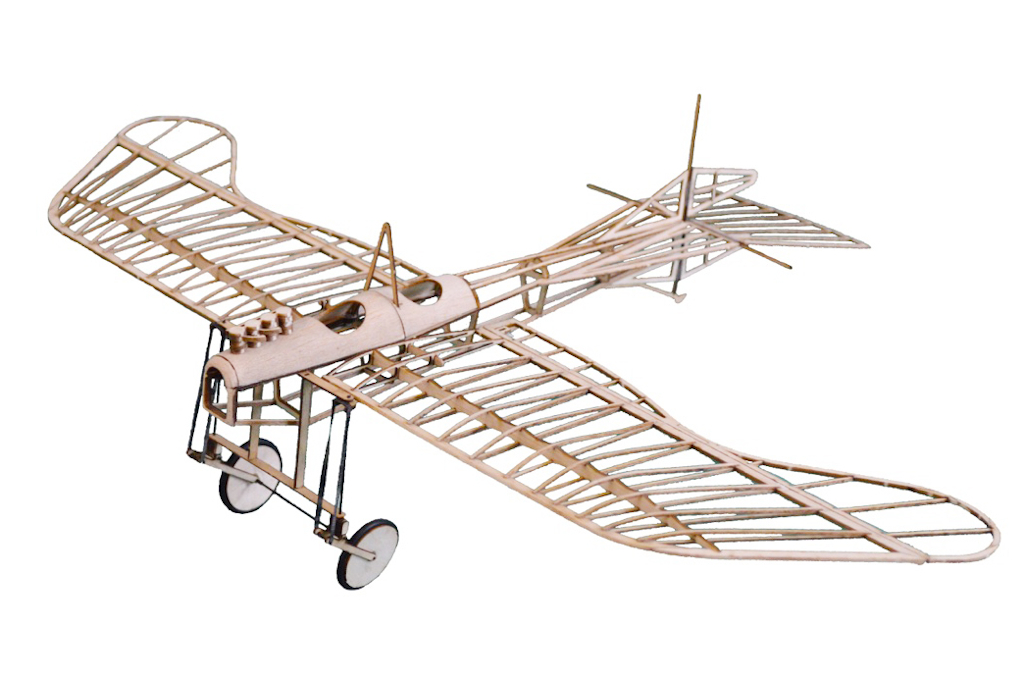
- Like I reported the last time. the majority of my time has been spent on the fuselage assembly. Last time I reported on construction of the inner ‘box’ of the fuselage assembly. This time I have progressed from a completed basic ‘box’ to completion of the entire fuselage itself. This consisted of building up the 10 fuselage formers by adding small laser cut pieces down each of the four sides of the box. There were 40 of these former pieces to be added with several of them being less than 1/4″ in size. Can you say tedious?
- Once the formers were in place, it was time to add the stringers all of which are 1/16″ square balsa strips. Adding the stringers went fairly quickly and easily but this is where I ran into a lot of rebuild as it is almost impossible to touch them without breaking them once they are installed. However, adding the stringers was rewarding in that once they were completed, the fuselage had it’s shape and actually looked like an airplane fuselage.
- At this point, the entire fuselage was trimmed and sanded in preparation for covering. The sanding process resulted in yet more stringers breaking and needing to be repaired. Sigh….
One issue that I was very aware of during the entire fuselage build was maintaining proper alignment of pieces to avoid the fuselage taking on a warped, lopsided, or ‘banana’ shape. This was hard to do in that everything is hand cut and there is no ‘jig’ used to build the components. It is a process of just cut and glue and try to make sure everything lines up correctly. The stringers and CA glue were key in making sure that the final fuselage shape was in correct alignment. The stringers could be added in such a way as to pull the fuselage into the desired alignment and then the CA glue would ‘lock it in’ in just seconds. I can’t imagine holding the stringers in alignment for hours at a time while the old Ambroid glue I used years ago set up. In the final analysis, I don’t think the fuselage is in 100% perfect alignment but I think it is ‘good enough’ to avoid any serious flight performance issues. As I progress further in my skills, I may learn better techniques for building in the proper alignment in cases like this.
So at this point, I am ready to begin covering the various components with tissue. I will be using a covering process that is new to me. In the past, I would have used dope to adhere the tissue, then shrunk it with water, then applied dope over the shrunk tissue. This process always resulted in lots of unwanted warps being introduced to the flight surfaces and it added weight which is to be avoided in a free flight model such as the Kharkov. This time, I will be using a ‘UHU Stic’ glue stick to adhere the tissue to the frames and then I will apply a very light water mist to shrink the tissue enough to result in a smooth surface but not tight enough to warp the surfaces. At least that is the theory. I’ll report all about this in the next Kharkov Build Report.
Here are photos of the plane assembly as it currently stands:
(Click on the photos to get a large image with higher resolution)
This first photo, which is set up in the same format as the photo in the previous post, is meant to show progress since that last post.
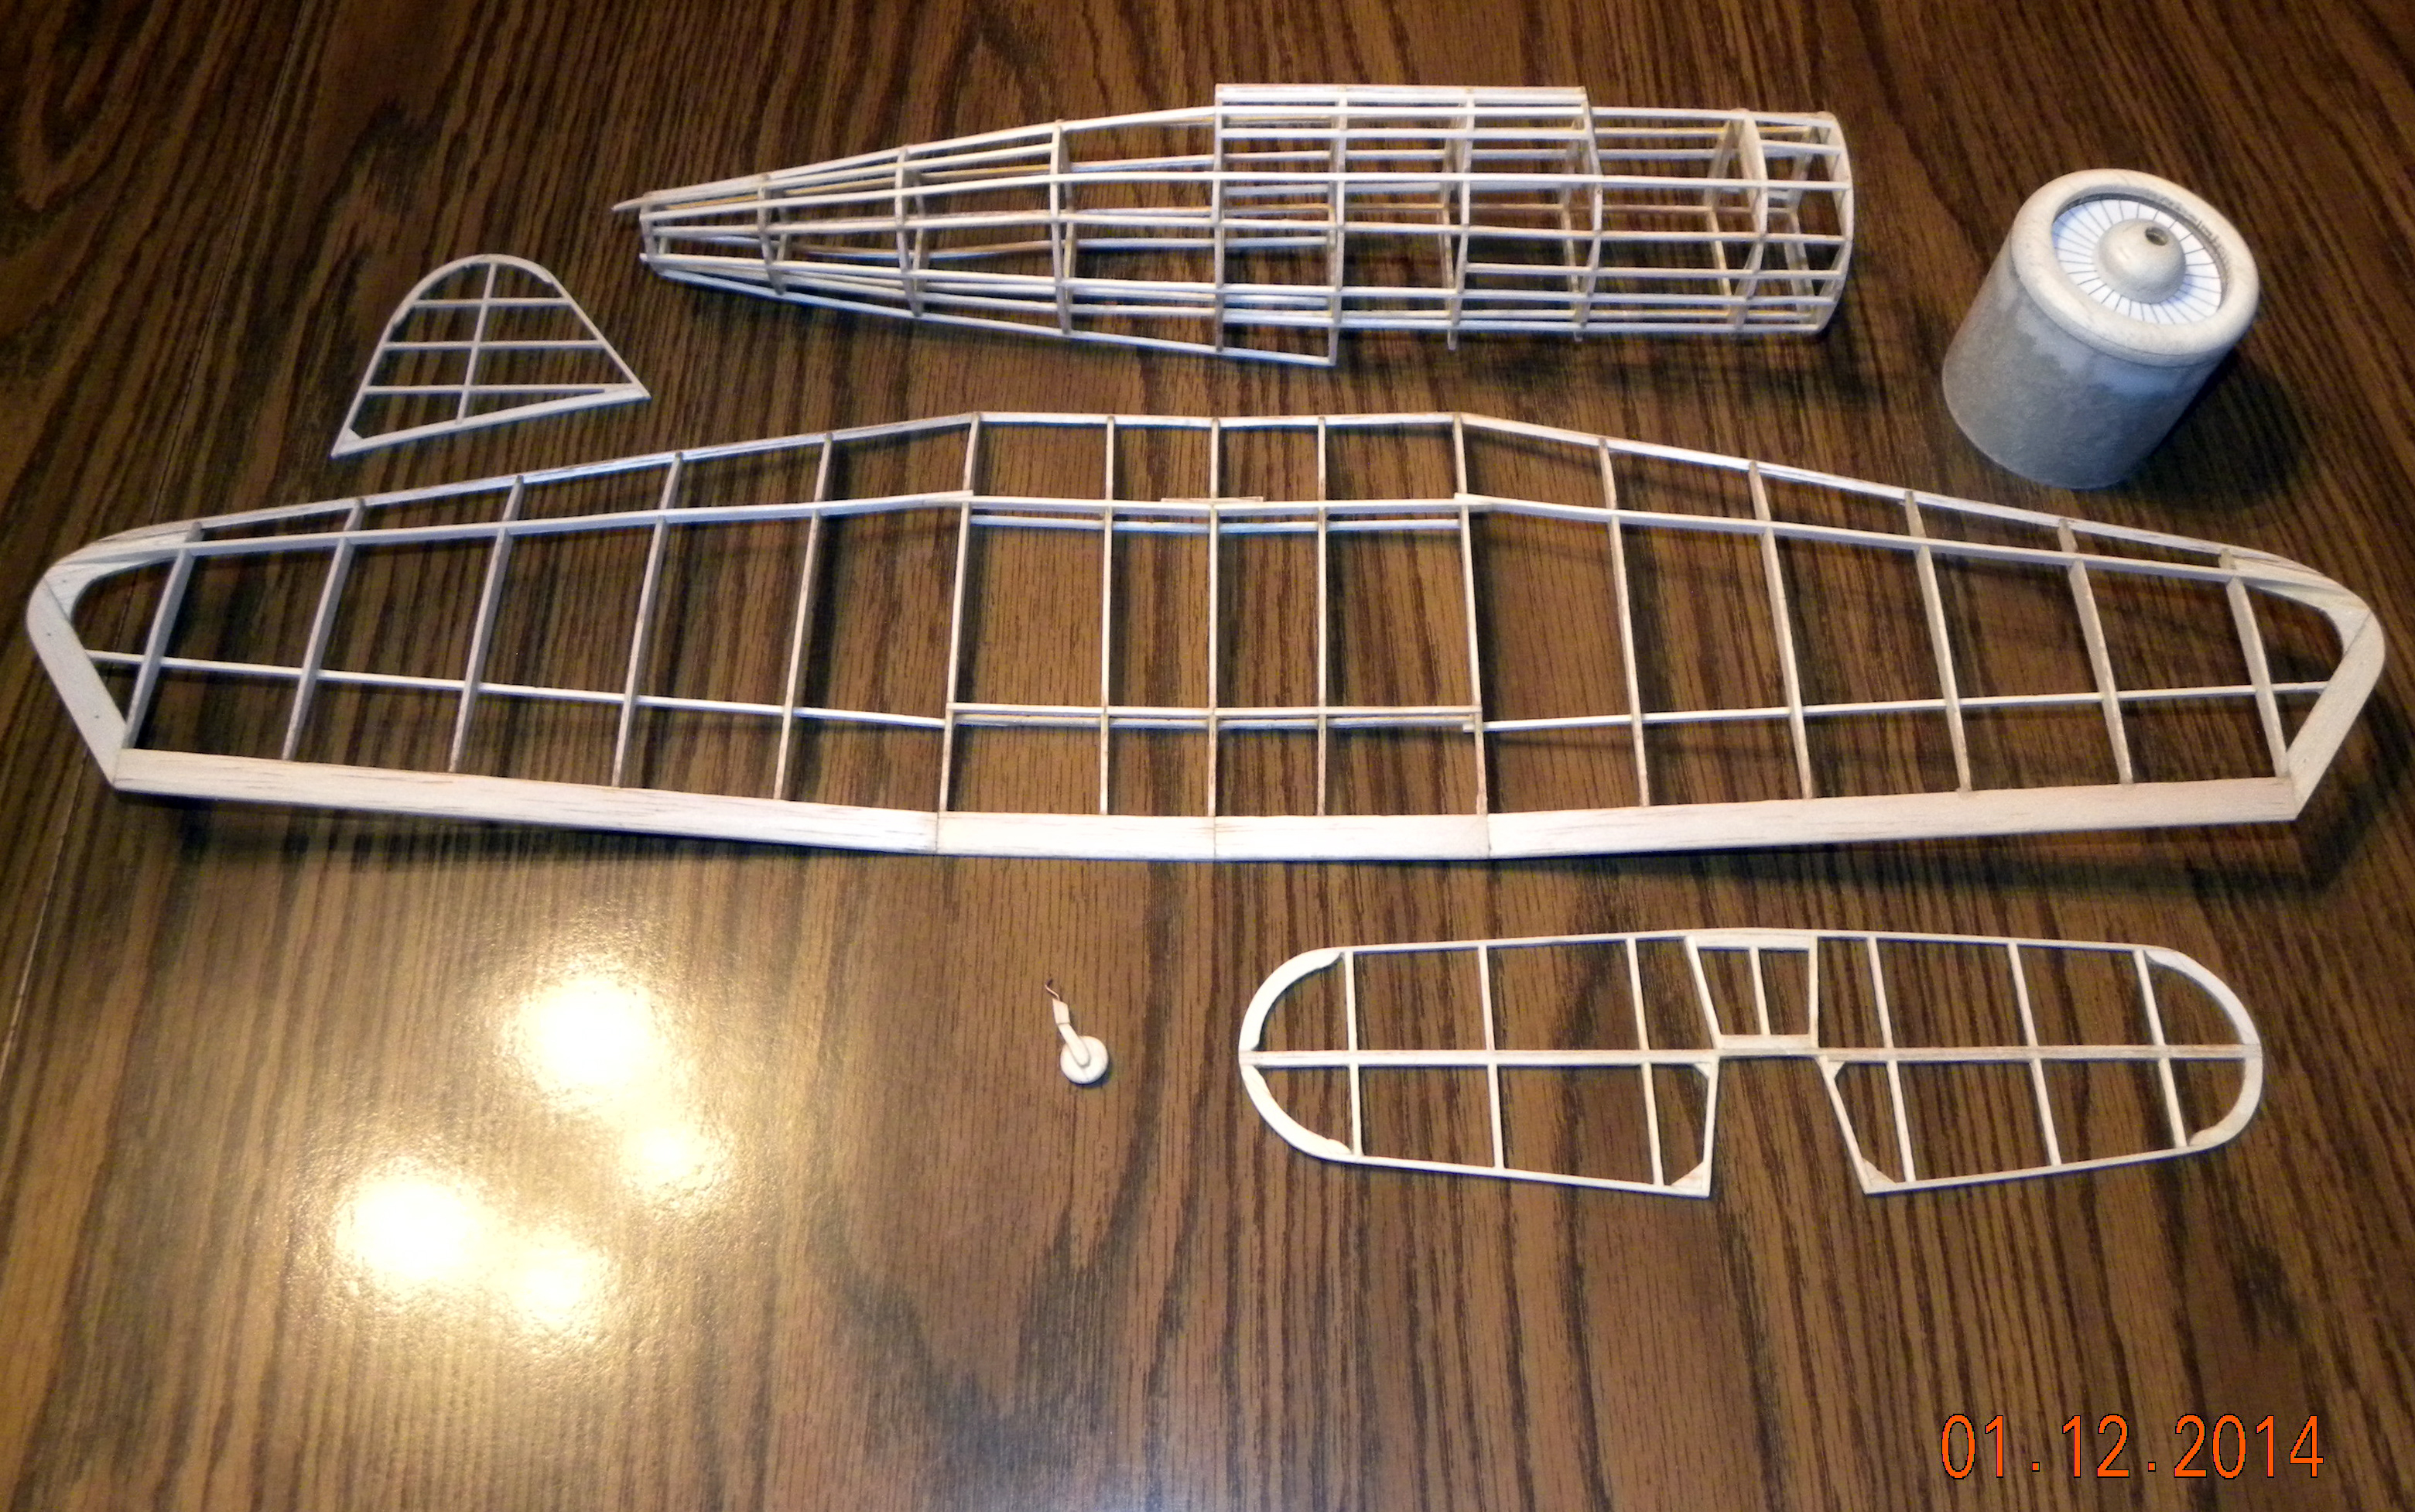
Photo of wing to show compound dihedral. There is 3/32″ dihedral from the center rib to the second rib on each side of the center rib, then the dihedral increases to a total of 1.25″ at the end of each wingtip.
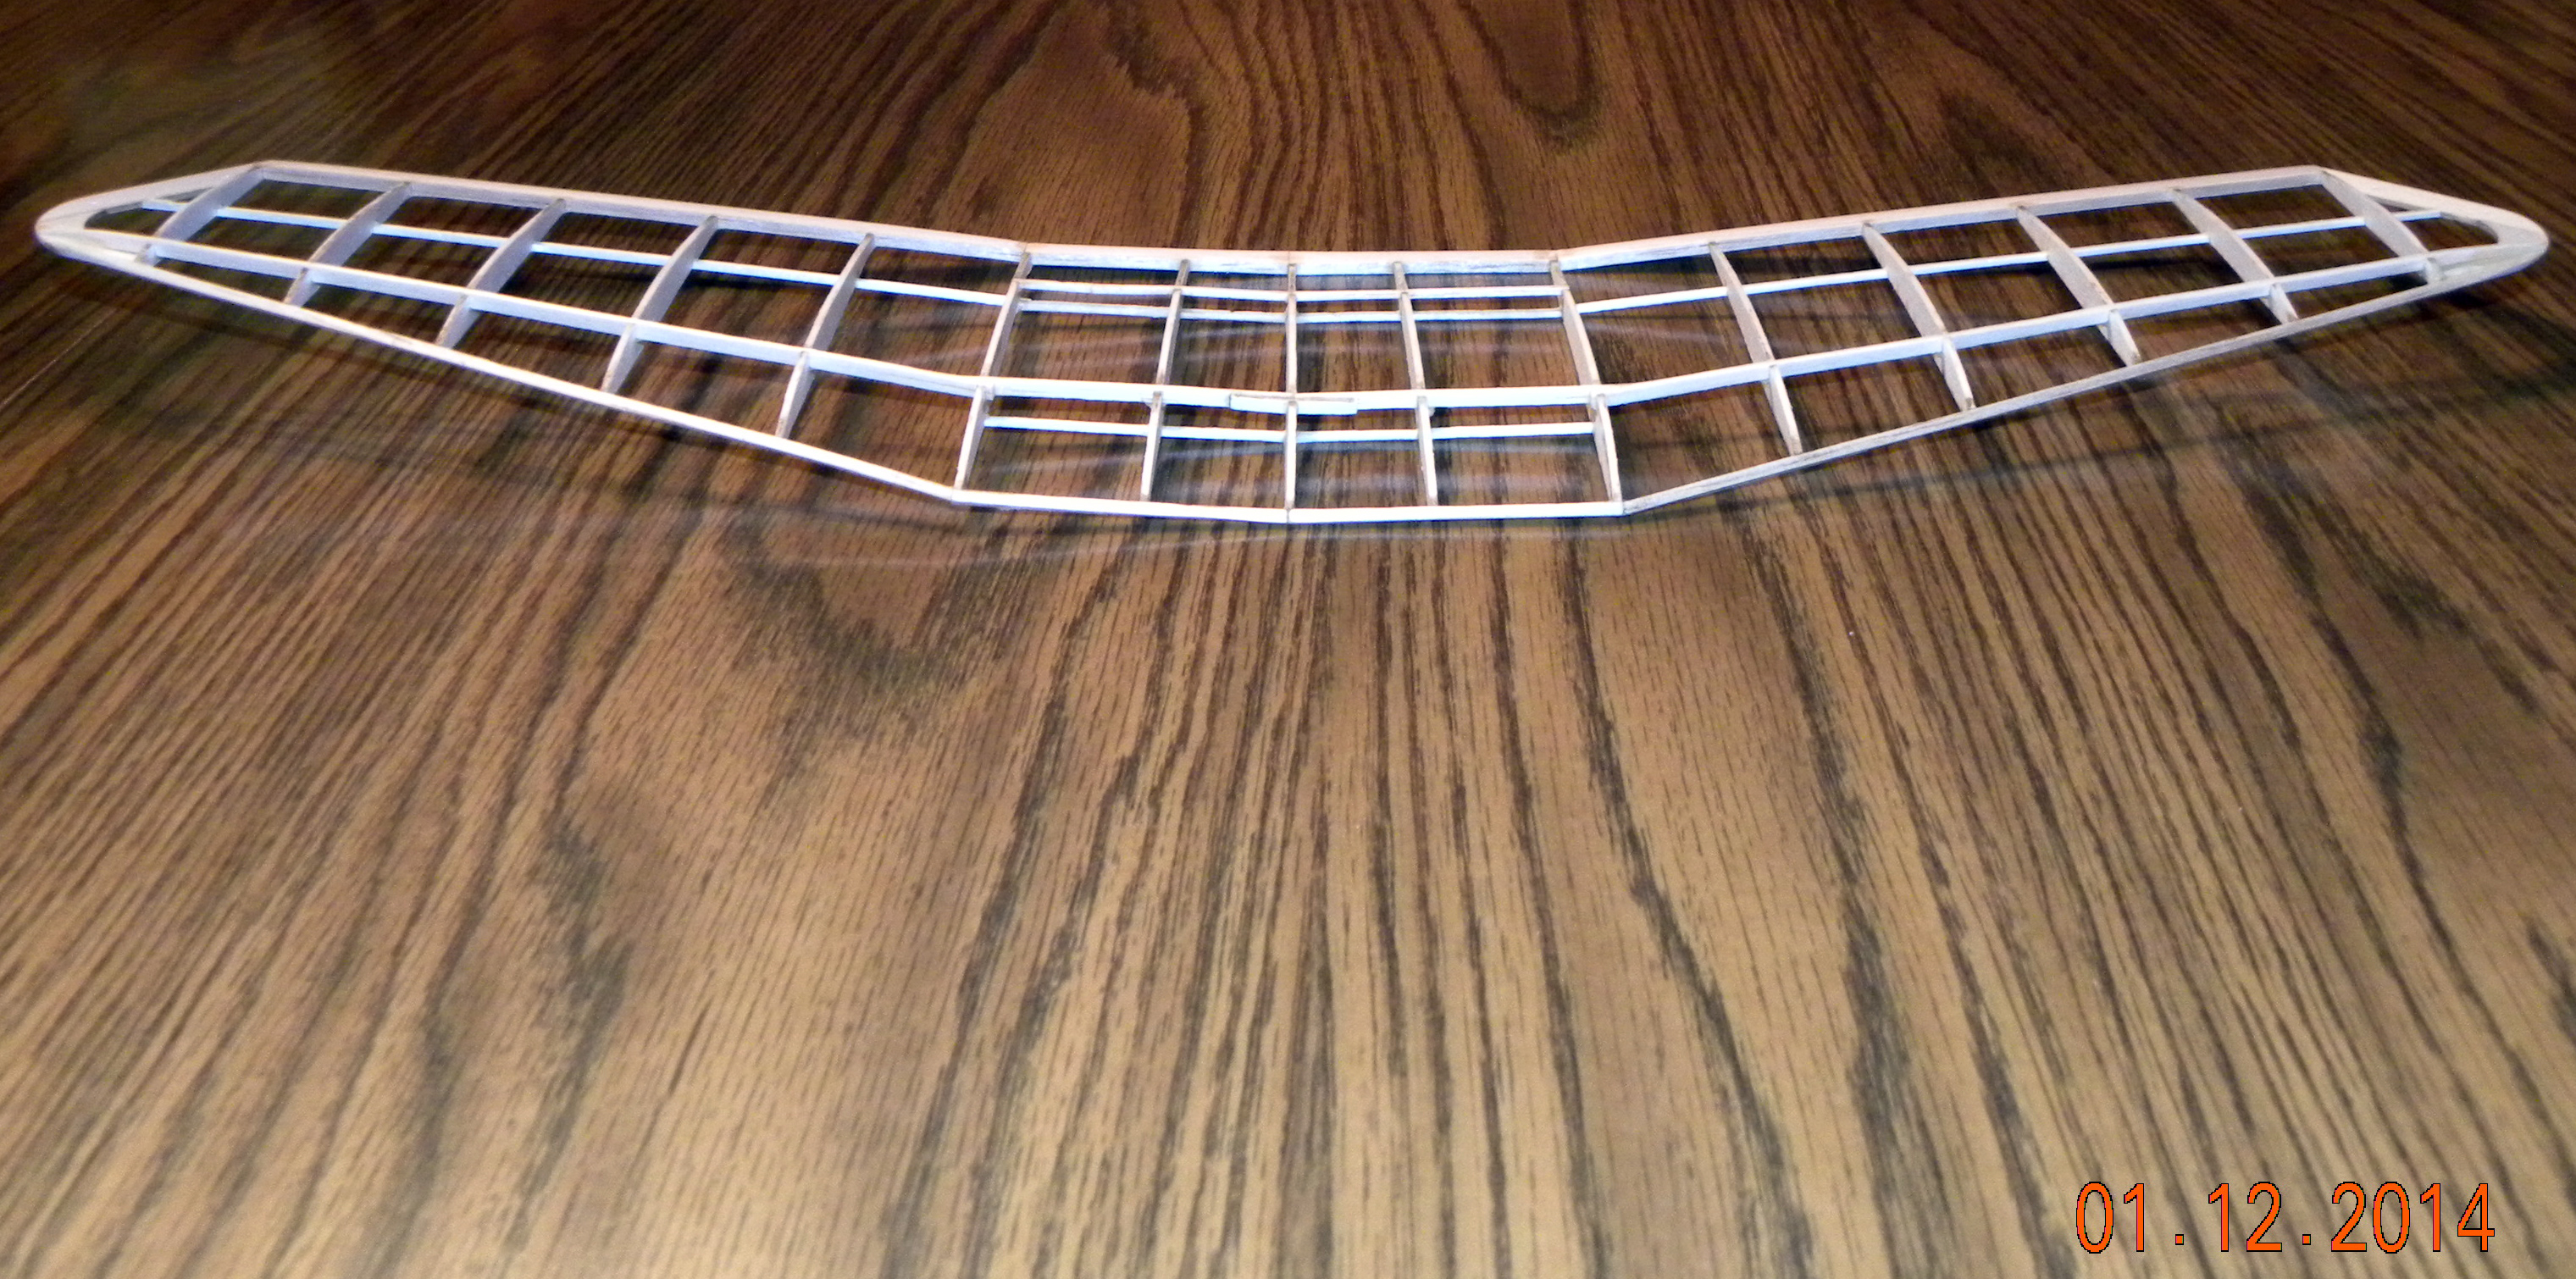
Photo of fuselage intended to show detail of the formers and stringers mentioned in this post.

Two photos of the overall model in its final configuration.