Wow…it’s hard to believe that it’s been 4 months since my last B-10 Bomber update! And the fact is, I’ve not been sitting around doing nothing during that time! Since my last B-10 post, I’ve restored a Sterling Mustang (A ‘Good’ Redux), hosted the local Ringmaster Fly-A-Thon, prepared all the wing ribs for the B-10 (the subject of this post), built 3 HO model railroad Craftsman structure kits (I needed a little diversion from model planes!), and finally, I completed the first phase of the B-10 outer wing panel builds (video update post on that to follow shortly here in FlyBoyz). Also, during the past 4 months, it was announced that the next Brodak Fly-in will be held in mid-June 2022. I decided that would be a great time and place to show off and fly the completed B-10. The only problem with that is that Brodak is only 6 months from now!! I need to get building on this B-10!!
While there are many techniques for cutting wing ribs from scratch, this wing features ribs that are both tapered in length and of various heights. Basically, each rib is an individual size and shape from the others so mass production methods of rib fabrication did not lend themselves in this situation. What I’ve outlined below is a technique that worked for me. Please note that this technique is repetitive and takes a LOT of time, but it worked very successfully for me. I plan to use the same techniques for fabricating the fuselage formers.
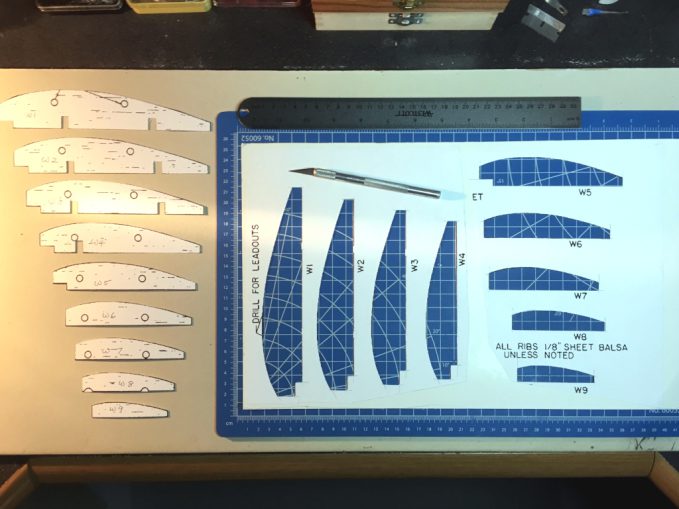
The process started with making templates that can be used to cut out the balsa ribs. The paper plans are too thin to make effective, useable templates so the ribs were first cut out from the plans and then glued to poster board. I used Krylon Easy-Tack Repositionable Adhesive 7020 ($8.99 a can at Wal-Mart) to adhere the paper rib plans to the poster board. I then used a sharp Exacto knife, a metal straight edge, and a steady (yea, right!) hand to cut the individual rib templates out from the poster board. What resulted were poster board templates that were robust enough to be used (repeatedly where necessary) to cut out the balsa ribs.
Once the poster board templates were ready, I laid them out on the balsa sheet stock and then used a LIGHT coat of the spray adhesive to hold them to the balsa. Then, I repeated the cut out process to get my rough cut balsa ribs. After the ribs were cut out, I drilled the holes for the control line leadouts then hardened the edges of the holes with CA glue. Finally, I sanded all the ribs to their final shapes.
What follows here is a series of photos that show the sequence of steps that I just outlined above.
(Click on photos to zoom in on them)
As I mentioned above, I have now completed the first phase of building the outer wing panels using the ribs shown above. I ran into a few issues with these outer panels and wanted to explain what I ran into. However, I felt that explanation would be too long a discussion to include with this rib fabrication post so I am working it up as a separate post. I also decided that it would be easier to explain things on video rather than trying to write it all out. So, while I am certainly no media star, I will try to explain the issues in my next B-10 Bomber post. Look for the video update here shortly.
I will end this post by offering Many Thanks to FAC (Flying Aces Club) master modeler John Koptonak for the techniques shown in this FlyBoyz post!


